Rubber Bushing Tool Set for Toyota Rear Axle Bushings
-
Code:70198
-
Weight:11.982 Kgs
Overview:
✔ Designed for removal and installation of rear axle rubber bushings
✔ Suitable for a wide range of Toyota vehicles
✔ Compatible with multiple OEM bushing references
✔ Includes tools for small, medium, and large bushings
✔ Complete kit with pull spindles, pressure adapters, bearing and C-frame
✔ Suitable for professional workshop use
This specialized tool set is designed for the removal and installation of rear axle rubber bushings on selected Toyota vehicles.
The kit contains dedicated adapters and installation components for various bushing sizes, allowing efficient servicing without damaging the bushing housing or surrounding suspension components.
Vehicle Compatibility
Suitable for:
- Toyota Avensis (M2)
- Toyota Corolla
- Toyota Corolla Verso (E12)
- Toyota Previa (R3)
- Toyota Yaris (P10, P13)
- Toyota Yaris Verso (P20, P21, P22)
- Toyota Camry
- Toyota Picnic (XM1)
Compatible Bushing References
Suitable for bushings such as:
- OEM 48725-28050
- OEM 48725-44050
- OEM 4872544050
- OEM 48725-02220
- OEM 48725-12580
- OEM 48725-0F010
- OEM 48725-47010
- OEM 48725-52010
- OEM 48725-52020
- OEM 48725-0D011
- OEM 48725-0D050
Features
The tool set supports the removal and installation of small, medium, and large rear axle rubber bushings.
Its modular design allows the technician to select the appropriate adapters and pressure components according to the bushing size, ensuring safe and controlled operation.
Key benefits:
- Rear axle bushing removal and installation
- Suitable for multiple bushing sizes
- Controlled force application
- Reduced risk of component damage
- Professional workshop quality
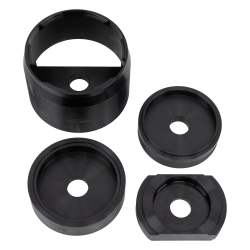
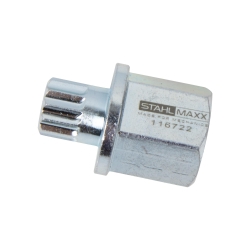
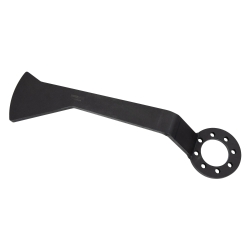
Technical Components
- Open semi-round removal tool
- Pull spindles M12 × 1.75 and M14 × 2.0
- Installation and removal pressure adapters
- Ball bearing support assembly
- Installation pressure plates
- Reduction sleeve for small bushings
- Heavy-duty C-frame assembly
- Holding jaws for different bushing sizes
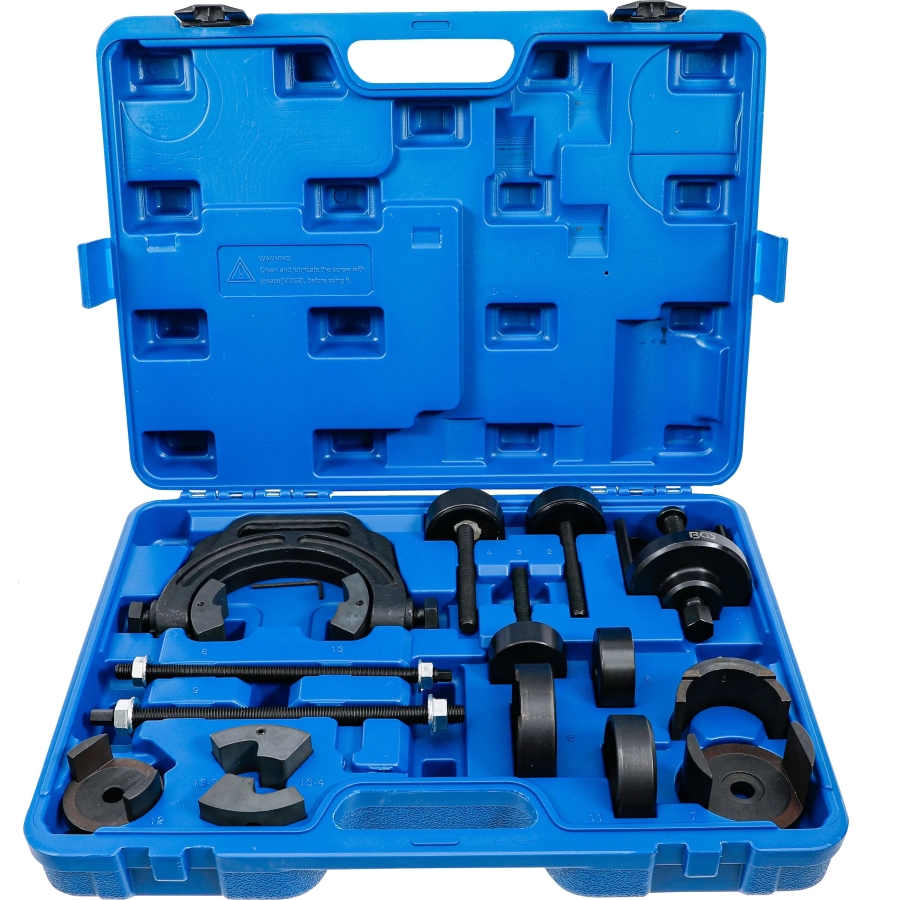
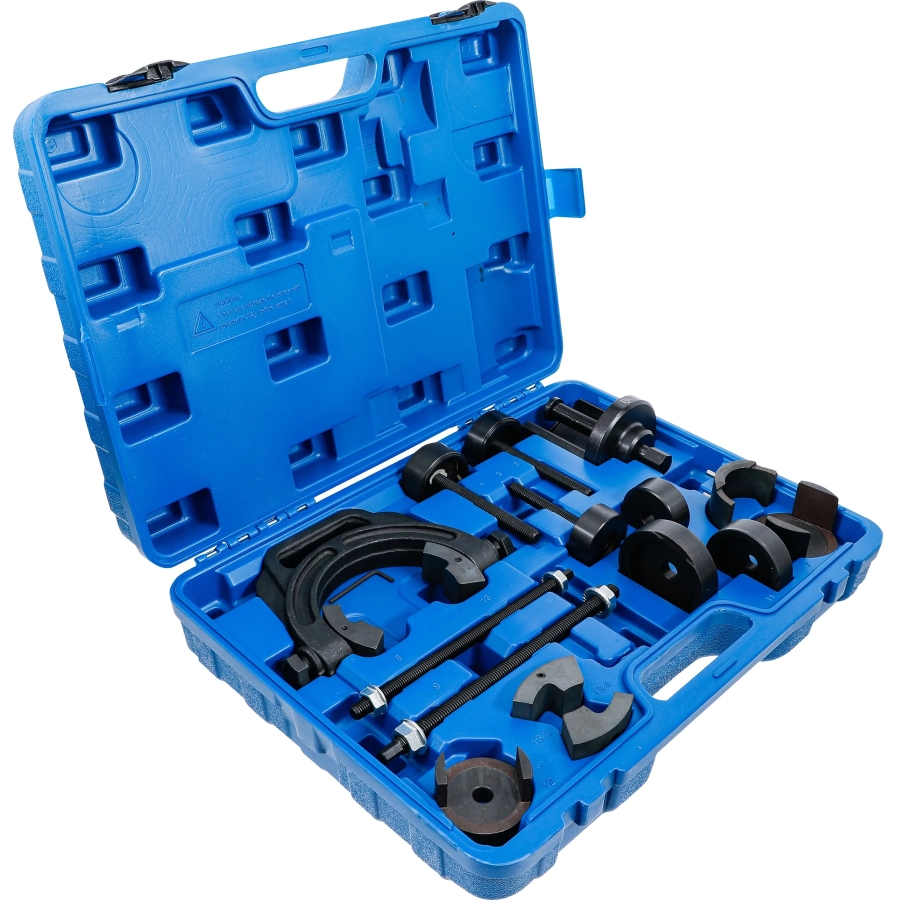
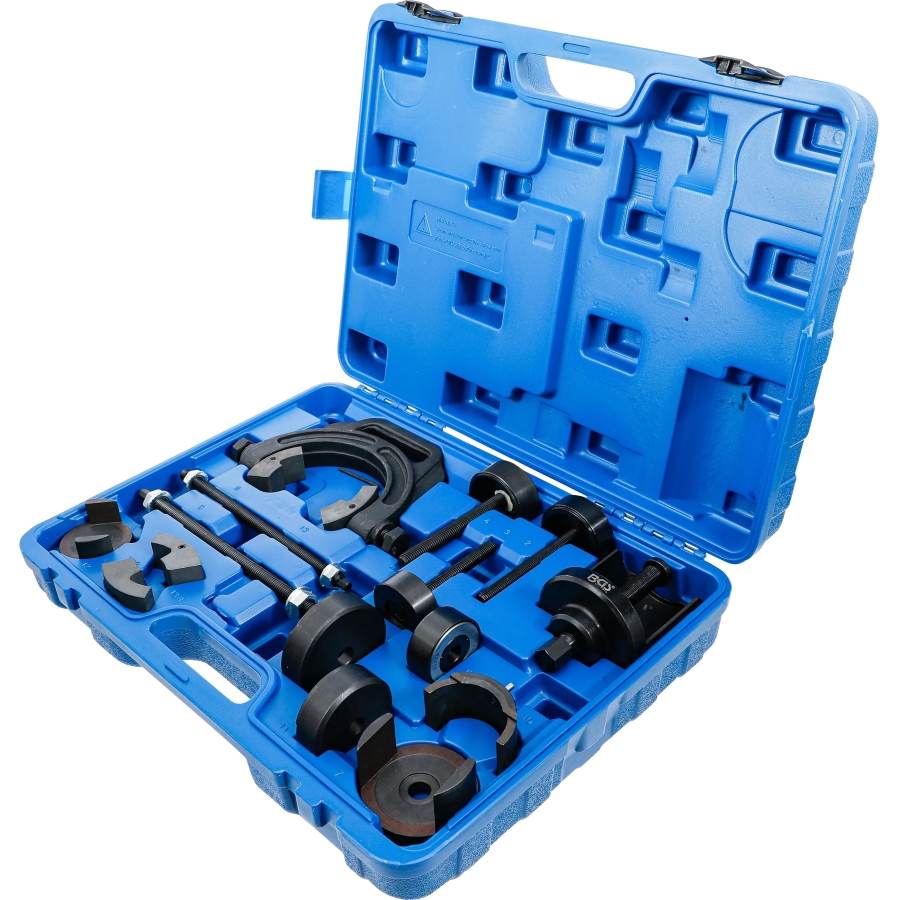
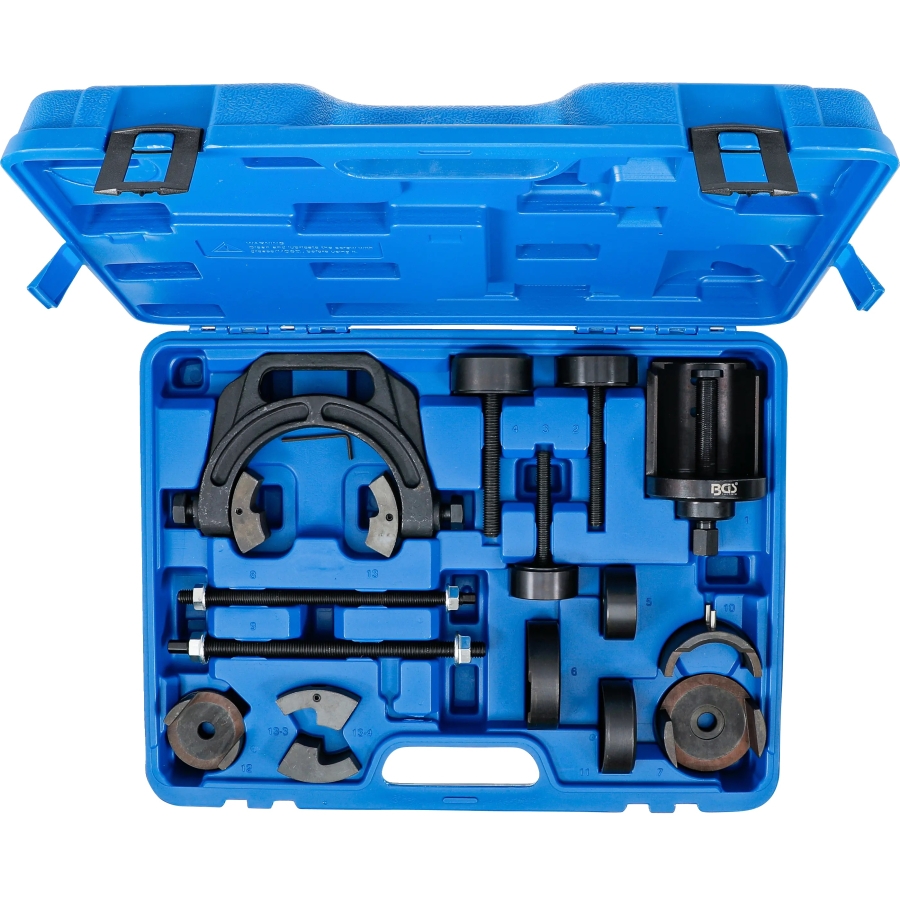
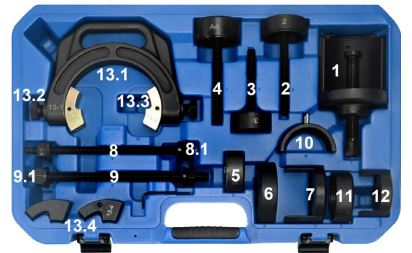
Package Contents
- 1 × Open semi-round removal tool with spindle, Ø 92 × 122 mm
- 1 × Removal pressure adapter with spindle for medium bushings, M12 × 1.5
- 1 × Removal pressure adapter with spindle for small bushings, M12 × 1.5
- 1 × Removal pressure adapter with spindle for large bushings, M14 × 2.0
- 1 × Ball bearing, Ø 57 × 23 mm
- 1 × Installation pressure plate for medium and large bushings, Ø 84 × 24 mm
- 1 × Installation pressure adapter for medium and large bushings, Ø 9.5 × 52 mm
- 1 × Pull spindle, M12 × 1.75
- 2 × Pull spindle nuts, M12 × 1.75
- 1 × Pull spindle, M14 × 2.0
- 2 × Pull spindle nuts, M14 × 2.0
- 1 × Reduction sleeve for small bushings
- 1 × Installation pressure plate for small bushings
- 1 × Installation pressure adapter for small bushings
- 1 × C-frame
- 2 × C-frame bolts, M16, SW24
- 2 × Holding jaws for medium and large bushings
- 2 × Holding jaws for small bushings
OEM numbers are provided for identification purposes only. Suitable for servicing rear axle rubber bushings on selected Toyota vehicles.


Removal of Large Bushings (e.g. Avensis)
Required Components
Components required: 1 | 4 | 9.1 | 13.1 | 13.2 | 13.3
Preparation
Important: Mark the installation position of the existing bushing before removal.
-
Insert the removal pressure piece (4) through the bushing from the outside of the axle and secure it with spindle nut (9.1).
-
Install the removal tool (1). Ensure that the edge of the tool engages behind the axle housing.
-
Hand-tighten the spindle to secure the tool and prevent it from falling.
Tool Installation
-
Attach holding jaws (13.3) to the C-frame (13.1) and secure them with the small screws.
-
Slide the C-frame (13.1) over the axle housing and secure it using the two large 24 mm bolts (13.2).
Bushing Removal
-
Remove the bushing by turning the outer spindle until the bushing is fully pressed out.
Installation of Large Bushings (e.g. Avensis)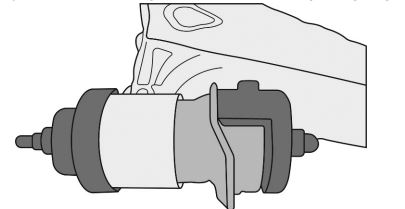
Required Components
Components required: 5 | 6 | 7 | 9 | 9.1
Preparation
-
Apply lubricant to the new bushing.
-
Position the bushing on the inside of the axle housing.
Tool Installation
-
Install pull spindle (9), nut (9.1), thrust bearing (5), and pressure plate (6) on the outside of the axle.
-
The recess in pressure plate (6) is designed to clear the weld seam.
-
Position pressure piece (7) on the inside of the axle and center it using nut (9.1).
Bushing Installation
-
Pull the bushing into position while ensuring the correct installation orientation is maintained.
Removal of Medium Bushings (e.g. Corolla)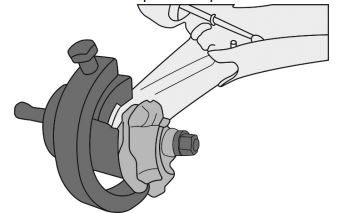
Required Components
Components required: 1 | 2 | 8.1 | 13.1 | 13.2 | 13.3
Preparation
Important: Mark the installation position of the existing bushing before removal.
-
Insert the removal pressure piece (2) through the bushing from the outside of the axle and secure it with spindle nut (8.1).
-
Install the removal tool (1). Ensure that the edge of the tool engages behind the axle housing.
-
Hand-tighten the spindle to secure the tool and prevent it from falling.
Tool Installation
-
Attach holding jaws (13.3) to the C-frame (13.1) and secure them with the small screws.
-
Slide the C-frame (13.1) over the axle housing and secure it using the two large 24 mm bolts (13.2).
Bushing Removal
-
Remove the bushing by turning the outer spindle until the bushing is fully pressed out.
Installation of Medium Bushings (e.g. Corolla)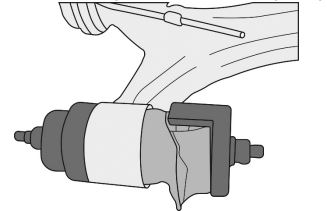
Required Components
Components required: 5 | 6 | 7 | 8 | 8.1
Preparation
-
Apply lubricant to the new bushing.
-
Position the bushing on the inside of the axle housing.
Tool Installation
-
Install pull spindle (8), nut (8.1), thrust bearing (5), and pressure plate (6) on the outside of the axle.
-
The recess in pressure plate (6) is designed to clear the weld seam.
-
Position pressure piece (7) on the inside of the axle and center it using nut (8.1).
Bushing Installation
-
Pull the bushing into position while ensuring the correct installation orientation is maintained.
Removal of Small Bushings (e.g. Yaris)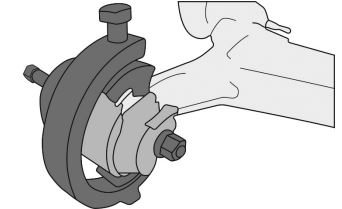
Required Components
Components required: 1 | 3 | 8.1 | 10 | 13.1 | 13.2 | 13.4
Preparation
Important: Mark the installation position of the existing bushing before removal.
-
Insert the removal pressure piece (3) through the bushing from the outside of the axle and secure it with spindle nut (8.1).
-
Install reducing sleeve (10) into the removal tool (1). This is required due to the smaller axle diameter.
-
Install the removal tool (1). Ensure that the edge of the tool engages behind the axle housing.
-
Hand-tighten the spindle to secure the tool and prevent it from falling.
Tool Installation
-
Attach holding jaws (13.4) to the C-frame (13.1) and secure them with the small screws.
-
Slide the C-frame (13.1) over the axle housing and secure it using the two large 24 mm bolts (13.2).
Bushing Removal
-
Remove the bushing by turning the outer spindle until the bushing is fully pressed out.
Installation of Small Bushings (e.g. Yaris)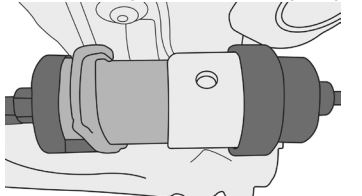
Required Components
Components required: 5 | 8 | 8.1 | 11 | 12
Preparation
-
Apply lubricant to the new bushing.
-
Position the bushing on the inside of the axle housing.
Tool Installation
-
Install pull spindle (8), nut (8.1), thrust bearing (5), and pressure plate (11) on the outside of the axle.
-
The recess in pressure plate (11) is designed to clear the weld seam.
-
Position pressure piece (12) on the inside of the axle and center it using nut (8.1).
Bushing Installation
-
Pull the bushing into position while ensuring the correct installation orientation is maintained.