Rear Subframe Bushing Tool Set for BMW 5 Series E60 E61 E63 E64
-
Code:118534
-
Weight:4.500 Kgs
Overview:
✔ Professional tool set for rear subframe bushing replacement
✔ Suitable for BMW 5 Series E60, E61, E63 and E64
✔ Designed for front and rear rubber-metal bushings in the rear axle carrier
✔ Enables bushing replacement directly on the vehicle
✔ No complete rear axle removal required
✔ Includes press adapters, spindle, sleeve and thrust bearing
✔ Ensures correct installation height and positioning of bushings
✔ Suitable for professional suspension repair work

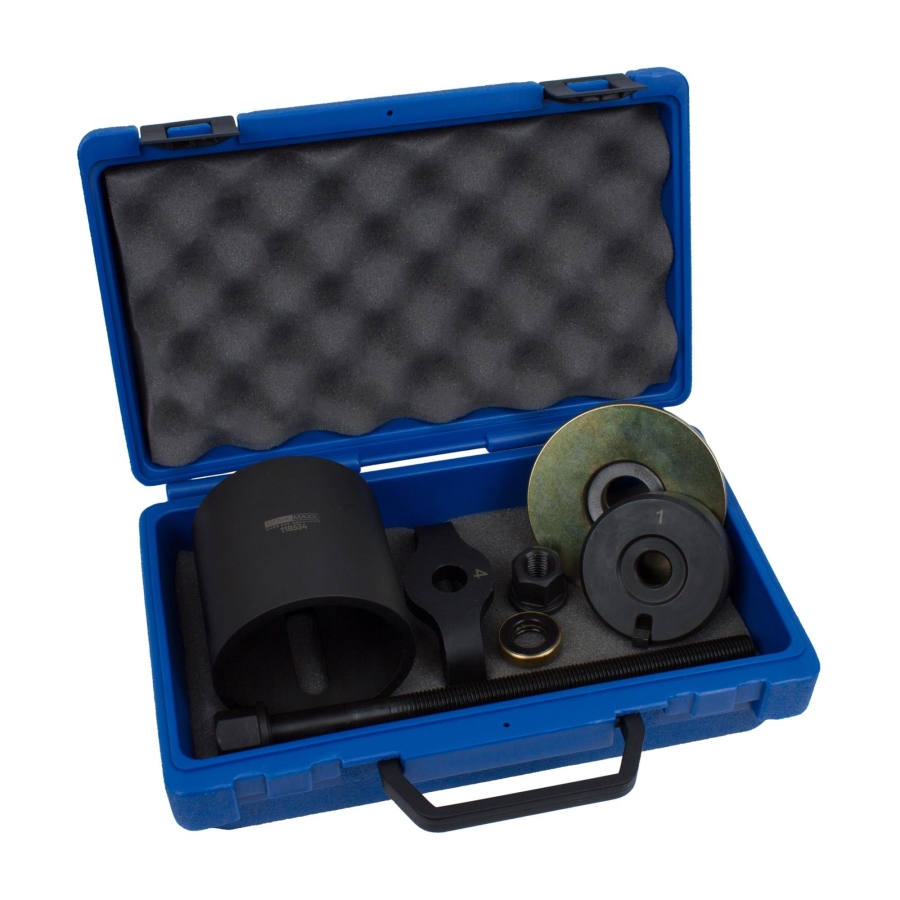
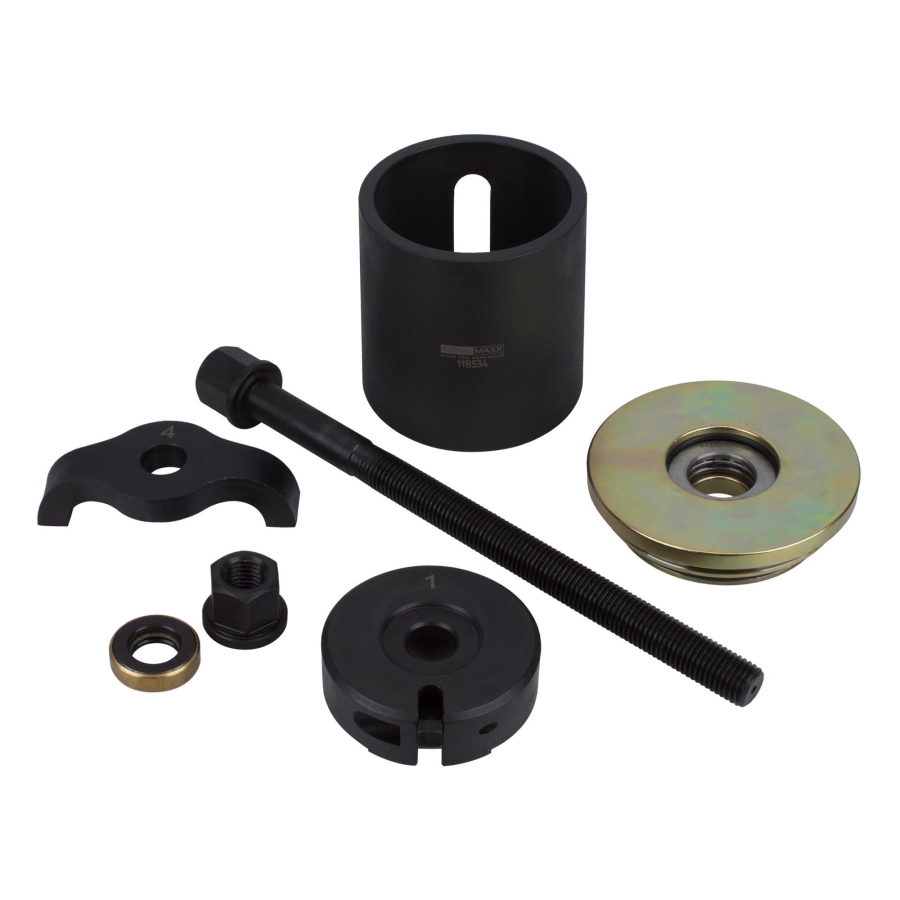
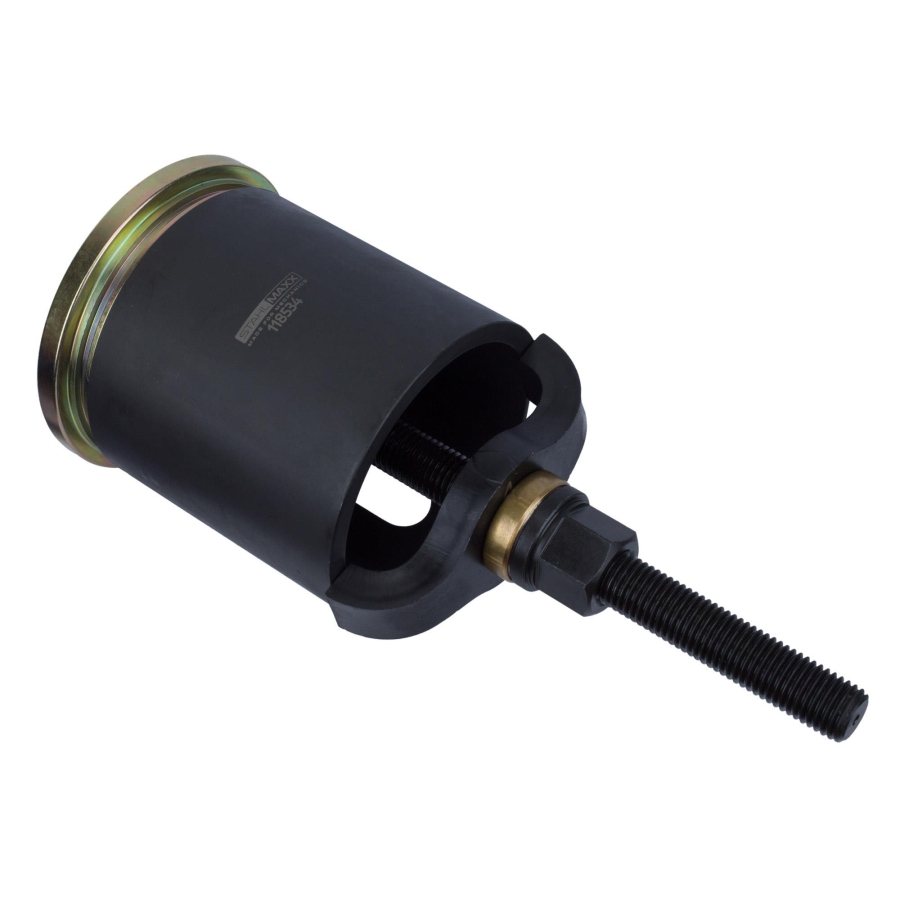
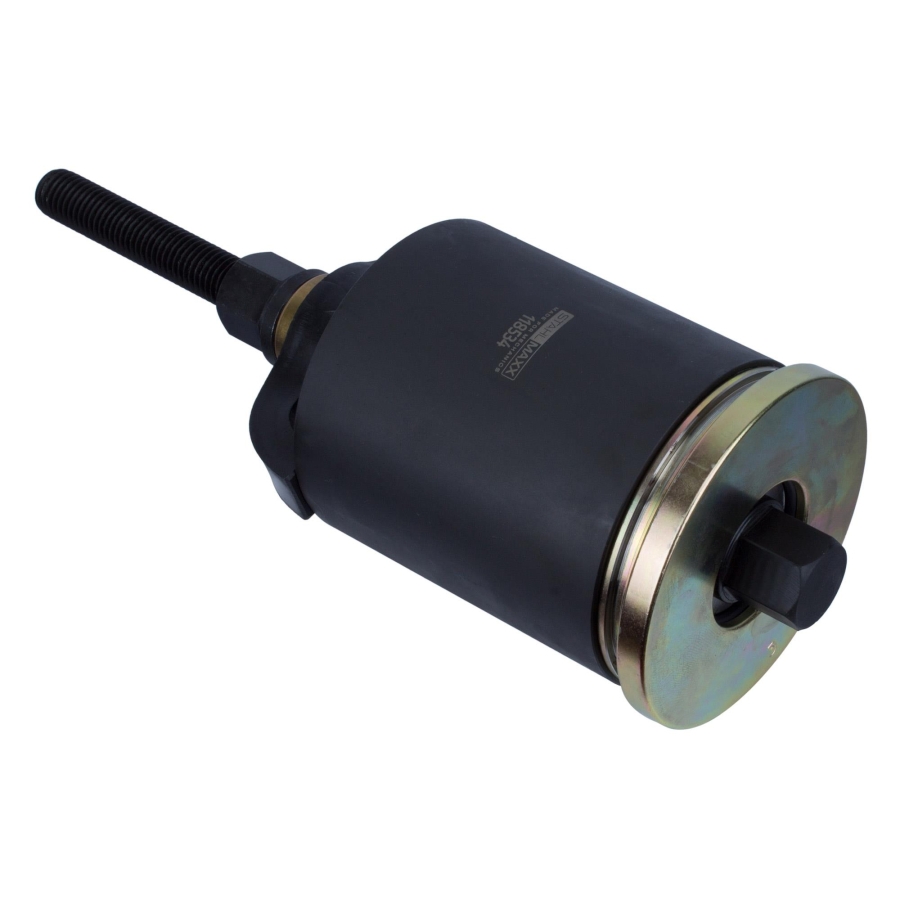
This professional special tool set is designed for replacing the front and rear rubber-metal bushings in the rear axle carrier on BMW 5 Series E60, E61, E63 and E64 models.
The tool enables fast and efficient replacement of the rear subframe bushings directly on the vehicle without complete removal of the rear axle assembly, significantly reducing repair time.
The tool set ensures the correct installation height and installation position of the bushings. However, manufacturer repair specifications and suspension alignment procedures must always be followed and verified during installation.
To ensure long service life of the spindle system, impact wrench use is not permitted.
For optimal operation, the rear axle housing should be cleaned and lightly lubricated before installation, and all tool threads should be cleaned and lubricated with MoS2 grease.
Front and rear bushings are removed and installed using the same procedure.
Vehicle Compatibility
Suitable for:
BMW 5 Series
- E60
- E61
- E63
- E64
Compatible Bushings
Suitable for bushings such as:
- BMW OE 33 31 6 764 904
- BMW OE 33 31 6 770 826
- Lemförder 35039 01
- Meyle 314 710 0022
OEM Reference Numbers
For use as:
- BMW as 334270
- BMW as 83300494654
Important Information
- Rear axle carrier must be lowered during service
- Do not use impact wrenches
- Clean and lubricate all spindle threads with MoS2 grease
- Clean and lightly lubricate rear axle mounting surfaces before installation
- Installation orientation of the bushings must be observed carefully
Installation Notes
Bushing Removal
- Heat the bushing for approximately 2 minutes using a hot air gun up to max. 600°C to ease removal
- Install pressure adapter and extraction sleeve according to the tool configuration
- Use spindle and bearing assembly for controlled extraction
Bushing Installation
- Lubricate the new bushing before installation
- Install bushings with rigid elements rotated 90° relative to driving direction
- Follow directional arrows on the bushings where applicable
- Press the bushing until proper installation depth is achieved
Package Contents
- Pressure adapter with latch, for use as BMW 334274 / 83300494713 and 334153 / 83300492410
- Adapter plate for sleeve, for use as BMW 334271 / 83300494710
- Sleeve, for use as BMW 334272 / 83300494711
- Pressure adapter, for use as BMW 334274 / 83300494713
- Nut M16x2, SW24, for use as BMW 334155 / 83300492412
- Spindle M16x2, 260 mm, for use as BMW 334154 / 83300492411
- Thrust bearing 16 × 24 mm, for use as BMW 334154 / 83300492411
Applications
Suitable for:
- Rear subframe bushing removal
- Rear subframe bushing installation
- Rear axle carrier repairs
- Rear suspension maintenance
- Professional BMW suspension service
OEM and reference numbers are provided for identification and comparison purposes only. This tool is not an original manufacturer product.
This special tool set is designed for the removal and installation of the front and rear rubber-metal bushings in the rear axle subframe. The bushings can be replaced directly on the vehicle without removing the complete rear axle assembly, allowing for significant time savings.
Compatible Vehicles
Suitable for the rear axle construction on the following BMW 5-Series models:
-
BMW E60
-
BMW E61
-
BMW E63
-
BMW E64
OEM Reference
-
Equivalent to BMW tool: 334270 / 83300494654
Compatible Bushing / Mount OEM Numbers
-
BMW OE: 33 31 6 764 904
-
BMW OE: 33 31 6 770 826
-
Lemförder: 35039 01
-
Meyle: 314 710 0022
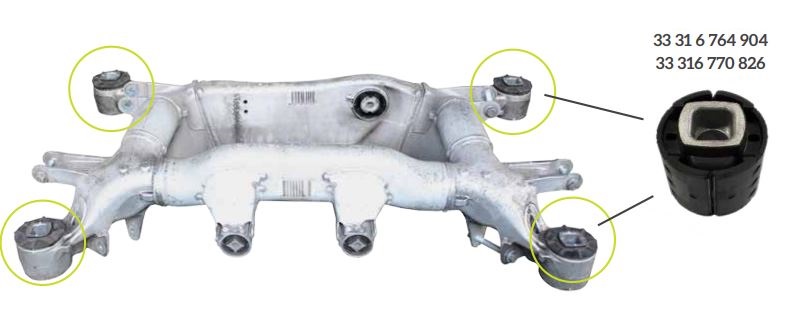
Important Information
Warning
To ensure the service life of the threaded spindle components, the use of impact wrenches is strictly prohibited.
Although the tool ensures the correct installation height and positioning of the bushings, always refer to and follow the vehicle manufacturer’s workshop documentation to verify the correct alignment and positioning of the suspension components.
For Proper Tool Operation
The tool will function correctly and maintain long-term durability only if the following conditions are met:
-
The mounting bore in the rear axle is cleaned and lightly lubricated.
-
All threaded parts of the tool are cleaned from debris and coated with MoS2 grease.
Preparation Before Use
The rear axle carrier must be lowered for this procedure.
Required Preliminary Work
-
Remove the rear wheels
-
Remove the exhaust system
-
Partially loosen the rear heat shielding
-
Remove both parking brake cables from their retaining hooks
-
Disconnect connectors for ABS sensors, brake pad wear sensors, and ride height sensors if equipped
-
Loosen the shock absorbers from the carrier and remove the control arms
-
Loosen the rear axle carrier bolts, remove the stop plates, and lower the carrier
Important During Reinstallation
When reinstalling components, tighten the control arms first and then tighten the rear axle carrier bolts afterward.
Rear Axle Bushings
Note
The removal and installation procedures are identical for both the front and rear bushings.
Bushing Removal Procedure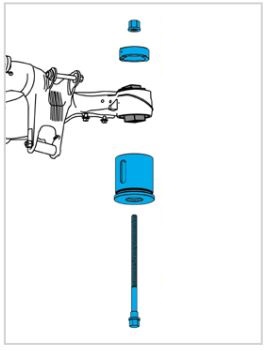
-
To simplify removal, it is recommended to heat the bushing for approximately 2 minutes using a hot air gun at a maximum temperature of 600°C
-
The locking pawl on the pressure piece must be folded inward for removal
-
Position the pressure piece on top of the bushing
-
Install the sleeve with the support plate from below
-
Secure the assembly using the spindle, thrust bearing, and nut
Bushing Installation Procedure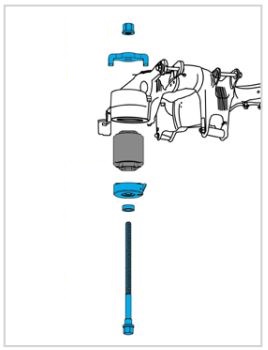
-
To simplify installation, it is recommended to lubricate the bushing with suitable assembly lubricant
-
The bushing must be installed with the rigid elements positioned at a 90° angle to the driving direction
-
Any arrows marked on the bushing must point either with or against the direction of travel as specified by the manufacturer
-
Position the pressure piece on top
-
The locking pawl on the pressure piece must be folded outward during installation
-
Install the pressure piece from below together with the spindle and thrust bearing, then secure using the spindle, thrust bearing, and nut
-
Press the bushing in until the locking pawl contacts the axle
-
Once correctly installed, the bushing should protrude approximately 4–5 mm above the axle housing