
Date: 16 Jan 2026
Replacing the engine mount bearing in the subframe of VAG vehicles is a task often perceived as time-consuming and risky—especially when different generations of engine carriers require different methods and solutions. In this newsletter, we want to show how the work can be performed in a controlled, repeatable manner without removing the engine, using a single specialized tool.
These subframes are found in, among others, the following vehicles:
Audi: A3 from 2003, Q2 from 2016, Q3 from 2011, TT from 2006
Seat: Alhambra from 2010, Altea from 2004, Ateca from 2016, Leon from 2005, Tarraco from 2018, Toledo from 2004
Skoda: Karoq from 2017, Kodiaq from 2016, Octavia from 2004, Superb from 2008*, Yeti from 2009*
VW: Arteon from 2017, Caddy from 2004*, CC from 2011, Eos from 2006, Golf from 2003, Jetta from 2004, Passat from 2005, Scirocco from 2008, Sharan from 2010, T-Roc from 2017 onwards, Tiguan from 2007 onwards, Touran from 2003 onwards
Different generations – one common solution
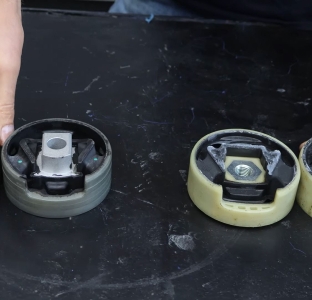
Engine mount bearings in VAG subframes come in three main designs:
Generation I – Aluminum (up to around 2015)
Classic aluminum subframe with front mounting points for sealing the bore.
Generation II – Steel (from around 2013)
Steel subframe without front mounting holes, requiring internal sealing and centering.
Generation III – Aluminum (from around 2020)
Aluminum subframe with reinforcement ribs and no external mounting points – requires expanding sealing tools.
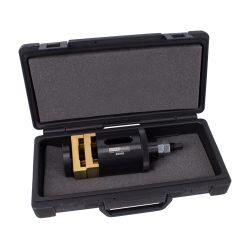
With the VAG Engine Mount Tool from STAHLMAXX, all of these variants are covered with a single set. Workshops already using the previous version (Art. No. 103336) can also upgrade cost-effectively via the expansion kit (Art. No. 124577).
Controlled removal – without damaging the subframe
The removal process is the same for all three generations:
-
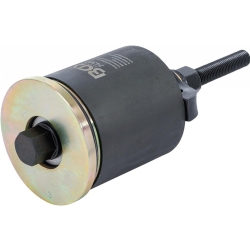
Removal pressure piece is mounted from above
-
Heavy-duty spindle is used for removal (designed for high loads)
-
Removal cone, adapter plate, and bearing nut with ball bearing ensure straight pulling
Practical workshop tip:
When the old bushing reaches the edge, it is recommended to lightly split it with a chisel. This reduces resistance and makes pressing out much easier.
A major advantage of the system is that in many cases the bushings can be removed without being damaged. If a pressing goes wrong, the bushing can be reinserted, saving both time and downtime.
Smart design – replaceable threaded inserts
If the thread in the press plate is ever damaged, the entire plate does not need to be replaced. The tool is designed with replaceable threaded inserts, which are easily secured with a set screw. This provides lower ownership costs and a longer tool lifespan.
Safe and precise installation
For installation, the following are used:
-
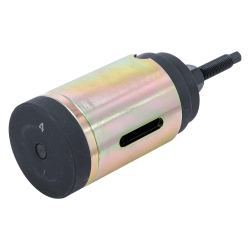
Thinner spindle (adapted for installation)
-
Conical compression sleeve
-
Installation pressure piece and adapter rings (for Generation II and III where the bushing must sit flush)
The bushings are prepared by:
-
Light chamfering of the outer edge (recommended)
-
Generous use of lubricant
-
Careful alignment according to clear markings
Pressing continues until the compression sleeve releases automatically and the bushing sits correctly against the stop – a clear confirmation of proper installation.
Post comment