





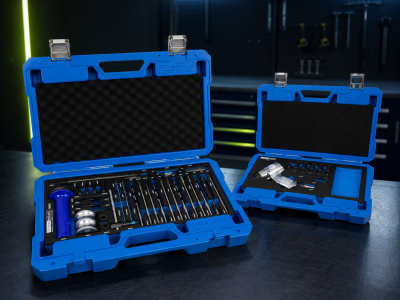
Complete Glow Plug Removal and Repair Guide
How to diagnose a defective glow plug, release it without breakage, identify what has failed when it turns endlessly, extract a broken body or tip, and restore damaged cylinder-head threads.
The correct repair depends on what is actually moving or broken. Begin with an electrical test. If replacement is required, use controlled vibration and limited loosening torque. If the glow plug turns but does not rise from the bore, stop and determine whether the complete plug or only the separated hex drive is rotating. If the body comes out without its tip, use the dedicated tip-extraction procedure.
This guide follows that repair logic so that the least invasive suitable method is used first.
Professional repair notice: Always identify the exact glow plug, thread size, drilling angle, permitted drilling depth and tightening torque from the applicable vehicle and glow plug service information. Protect all open engine passages from dirt and swarf. If the tool cannot be centred correctly, the drilling depth cannot be established, or contamination of the combustion chamber cannot be controlled, stop the repair and assess whether cylinder-head removal is the safer method.
Diagnose the Glow Plug Before Removing It
Confirm the defective plug before disturbing a thread that may have been untouched for many years.
Modern diesel engines may use low-voltage or multivolt glow plugs that must not be tested by simply applying vehicle battery voltage. A suitable diagnostic tester checks the glow plug safely in its installed condition and avoids unnecessary removal of functioning plugs.
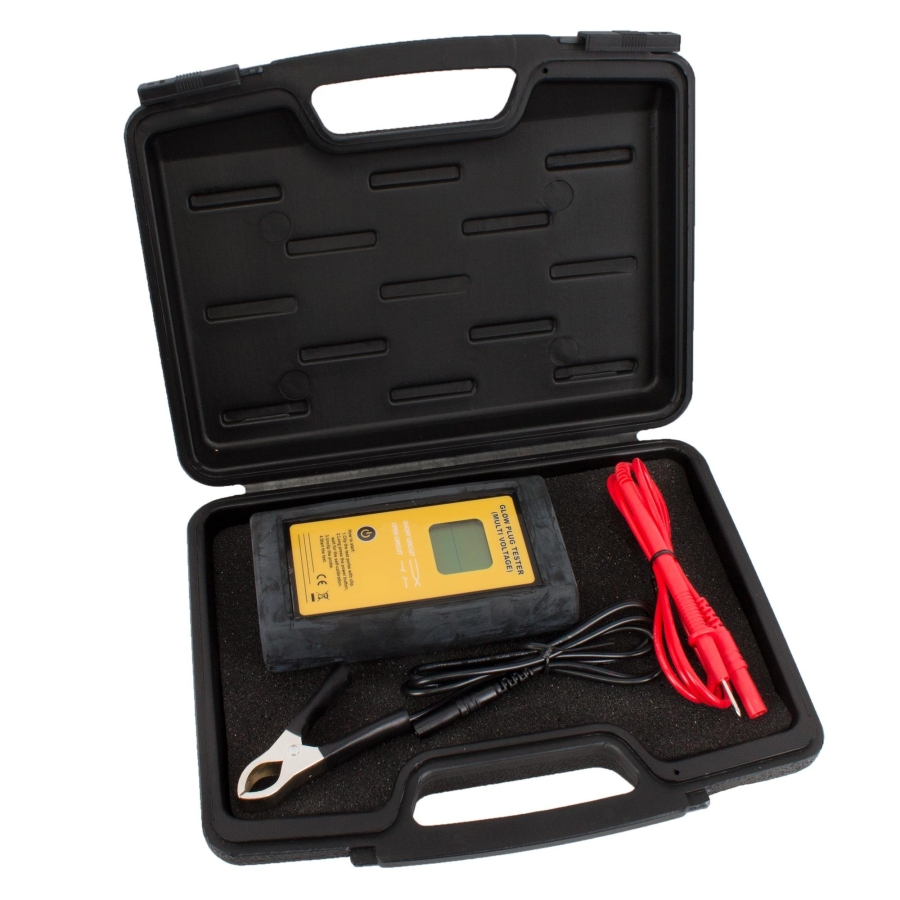
Glow Plug Tester – Multivolt 0V–48V
Tests glow plugs directly while installed, automatically detects defects and short circuits, and displays internal resistance for condition and wear comparison.
- Insert a 9V battery into the tester.
- Calibrate before first use and after replacing the battery or test leads: touch the probe and clip together, press the test button and allow the five-second countdown to finish.
- Disconnect the glow plug electrical connection as required by the vehicle procedure, then connect the black clamp to the vehicle battery negative terminal.
- Place the probe tip on the glow plug’s electrical terminal.
- Read the automatic condition result and resistance value. When assessing wear, compare the measured value with a new reference glow plug of the same type.
Why test first? A diagnostic fault code can identify the affected circuit, but an installed resistance test helps confirm the component itself. It also avoids the mechanical risk of removing a glow plug that does not require replacement.
Remove a Seized Glow Plug as Carefully as Possible
Controlled vibration and limited torque can prevent a difficult removal from becoming a drilling repair.
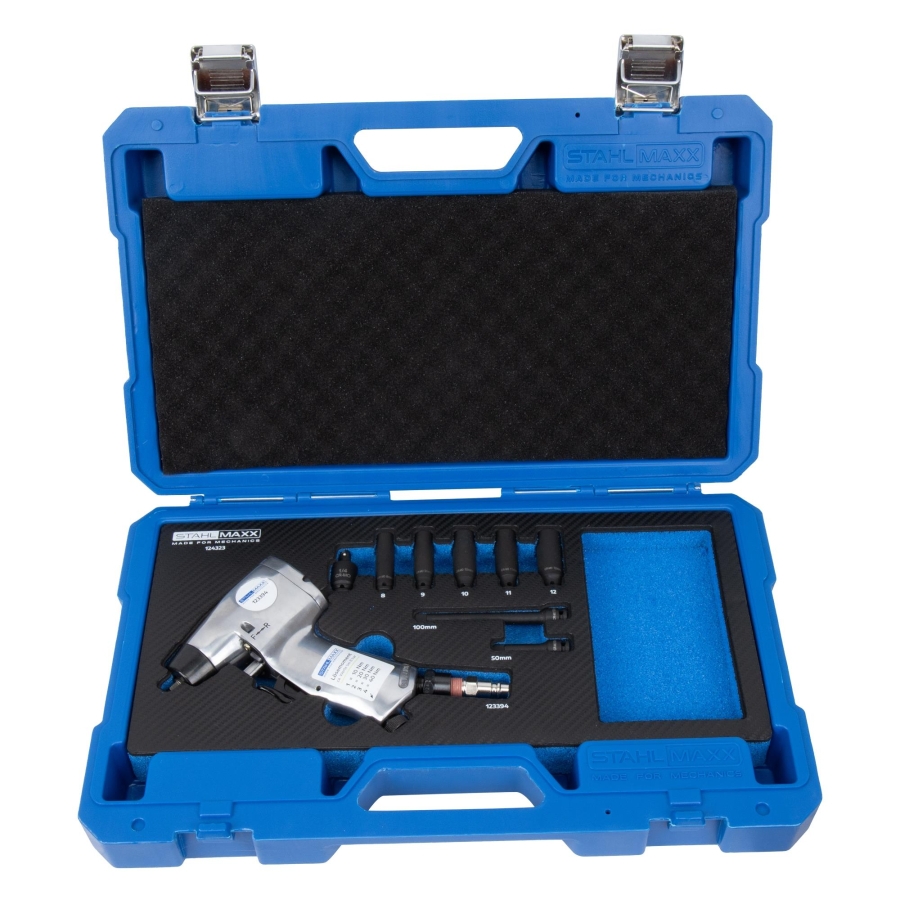
High-Frequency Impact Wrench, 15–60 Nm
The high-frequency twin-impact mechanism combines vibration with controlled low loosening torque. It is designed for carbonised, corroded or seized glow plugs and is fundamentally different from a conventional high-torque wheel impact gun.
Before loosening
- Confirm the correct socket size and unobstructed tool alignment.
- Remove loose dirt around the glow plug before opening the bore.
- Bring the engine to operating temperature, while observing burn and moving-component precautions.
- Know the plug’s permissible loosening or shear torque before applying force.
During loosening
- Keep the socket and extension straight to avoid side loading.
- Use the lowest effective torque and let vibration do the work.
- Work progressively instead of applying one high-torque shock.
- Stop if the plug deforms, the hex begins to separate or the torque limit is reached.
Recommended removal procedure
- With the engine warm, first try to loosen the glow plug carefully using a standard 1/4" ratchet.
- If it remains seized, apply suitable oil around the plug and allow it to penetrate. When practical, operate the vehicle and repeat the attempt after several days.
- Use the special high-frequency impact wrench at the lowest effective setting. Allow the vibration to work and increase the level only when necessary.
- Before using a higher setting, verify the actual counterclockwise loosening torque with a torque wrench capable of measuring in that direction.
- Never exceed the limit specified by the vehicle or glow plug manufacturer. If the limit is reached, stop rather than forcing the plug.
Reference breakage torque
| Glow plug thread | NGK reference breakage torque | Workshop rule |
|---|---|---|
| M8 | 20 Nm | Do not assume a 25 Nm tool setting is safe for every M8 plug. |
| M9 | 30 Nm | Confirm the exact plug and manufacturer data first. |
| M10 | 40 Nm | Use progressive vibration below the permitted limit. |
| M12 | 50 Nm | Stop if the plug does not release within its specification. |
These are reference values for NGK glow plugs. Other manufacturers may specify lower values. The vehicle and glow plug manufacturer’s current data always takes priority.
Reference tightening torque for the replacement plug
| Glow plug type | NGK reference tightening torque |
|---|---|
| M8 metal glow plug | 8.5 Nm |
| M8 ceramic glow plug | 10 Nm |
| M9 metal glow plug | 11 Nm |
| M9 ceramic glow plug | 18 Nm |
| M10 glow plug | 15 Nm |
| M12 glow plug | 23 Nm |
Use these values only as general references. Always tighten the exact replacement plug to its specified value.
The Removal Failed—What Exactly Has Broken?
Do not select an extractor until you know whether the missing part is the tip, the complete plug is rotating, or only the drive hex has separated.
The body came out, but the tip is missing
Do not start the engine. Use a guide-centred broken-tip extraction kit. Continue to broken tip removal.
The plug turns endlessly but does not rise
Perform the marker test below to determine whether the whole plug or only the hex drive is rotating.
The plug has broken at or below the drive
Centre, drill, prepare an extraction thread and pull the remaining body with the M8–M12 repair system.
The marker test: what is actually rotating?
Stop repeated turning. Rotate only far enough to identify the moving component. Continued spinning can enlarge thread damage or further separate the glow plug.
The complete glow plug is rotating
The mounting thread may be stripped, or the plug may already be fully unthreaded but remain trapped by carbon around its shaft. Apply axial extraction force using the dedicated 8/10 mm puller, then inspect the cylinder-head thread.
Only the drive hex is rotating
The hexagonal drive has separated from the threaded glow plug body. Turning the hex can no longer unscrew the body. Stop and use the guided drilling and extraction procedure.
Remove a Broken Glow Plug Tip
The glow plug body has been removed, but the heating tip remains inside the cylinder head.
Compare the removed glow plug with an identical new plug or inspect the bore to confirm that the complete heating tip has come out. If the tip is missing, prevent the engine from starting and do not allow the remaining piece to enter the combustion chamber.
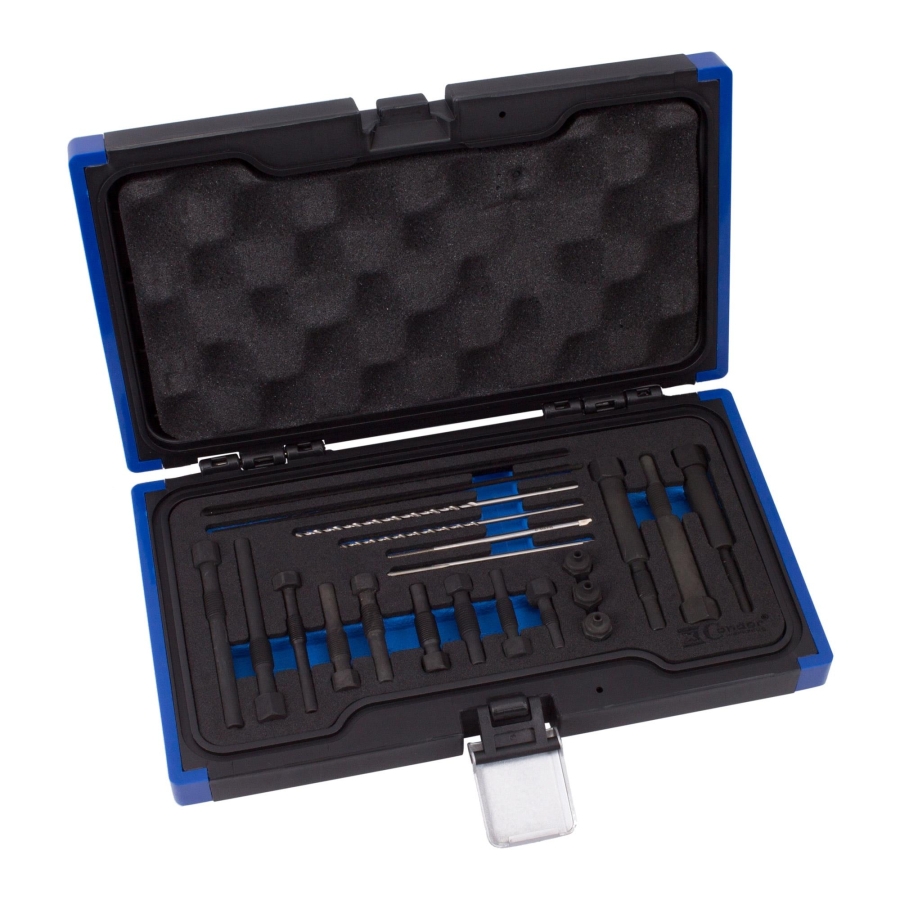
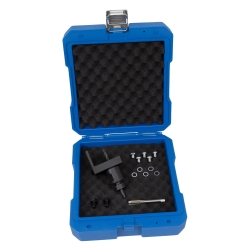
Broken Glow Plug Tip Removal Kit, M8 and M10
Nine guide adapters accurately centre the extra-long drills and taps for M8×1.0, M10×1.0 and M10×1.25 threads. Bearing-supported extraction adapters pull the prepared tip in a controlled manner.
Install the guide
Select the adapter for the exact glow plug thread and screw it into the cylinder head.
Drill the tip
Mark the permitted depth on the drill and create a centred hole without drilling too deeply.
Cut the puller thread
Remove the drill guide and cut the appropriate internal thread for the extraction spindle.
Extract the tip
Hold the adapter with a wrench and turn the extraction nut clockwise to pull the tip out gradually.
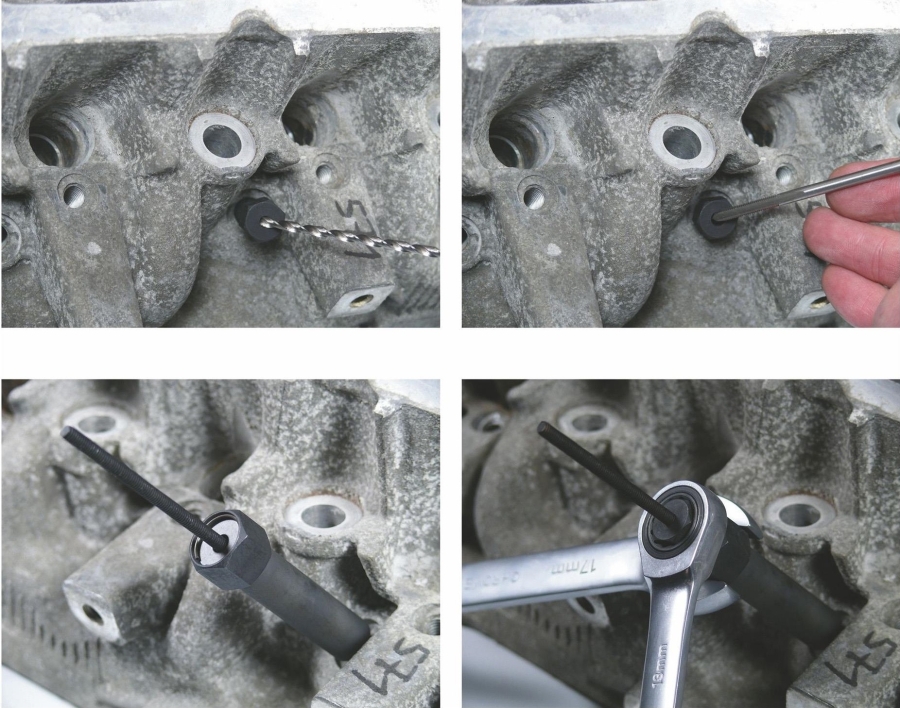
Extraction tip: Before applying full pulling force, release the tension on the extraction nut and tap the spindle carefully to help loosen the broken tip. After removal, clean the entire bore and verify that no part of the tip or repair debris remains.
The Complete Glow Plug Rotates but Will Not Come Out
Use axial extraction force when the damaged or disengaged thread no longer moves the glow plug out of the bore.
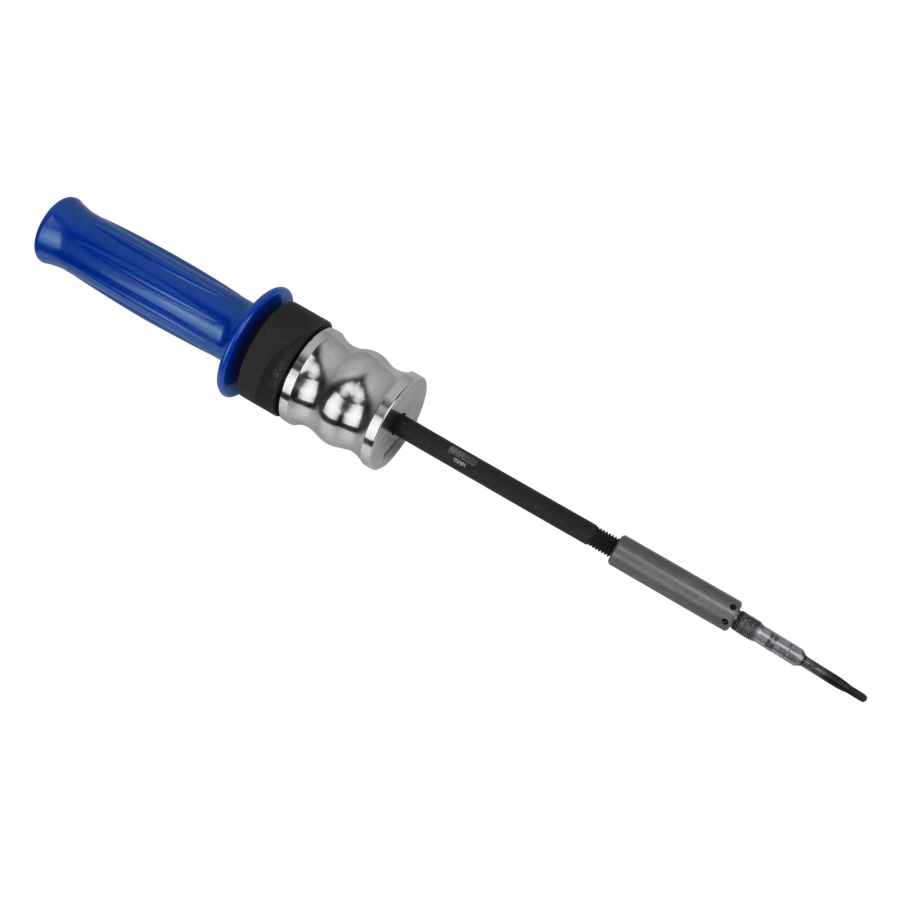
Extractor Set for Freely Spinning 8/10 mm Glow Plugs
Slim, hardened stainless-steel attachments reach narrow and deep glow plug bores. The slide hammer applies controlled axial extraction force without relying on the damaged mounting thread.
- Confirm with the marker test that the complete glow plug body rotates with the hex.
- Select the extraction attachment matching the 8 or 10 mm glow plug body and connect it securely to the slide hammer.
- Position the attachment on the glow plug according to the tool instructions. Keep the slide hammer aligned with the axis of the bore.
- Use short, controlled impacts to draw the glow plug out. Do not lever sideways against the aluminium cylinder head.
- After removal, inspect whether the plug was fully unthreaded and carbon-bound or whether the cylinder-head thread has stripped.
- Clean the bore. Re-cut a slightly damaged original thread or install a suitable repair insert when the thread can no longer retain the replacement glow plug.
Drill Out and Extract a Broken Glow Plug
Use this repair path when the drive has separated, the plug has broken in the head, or the remaining body cannot be unscrewed normally.
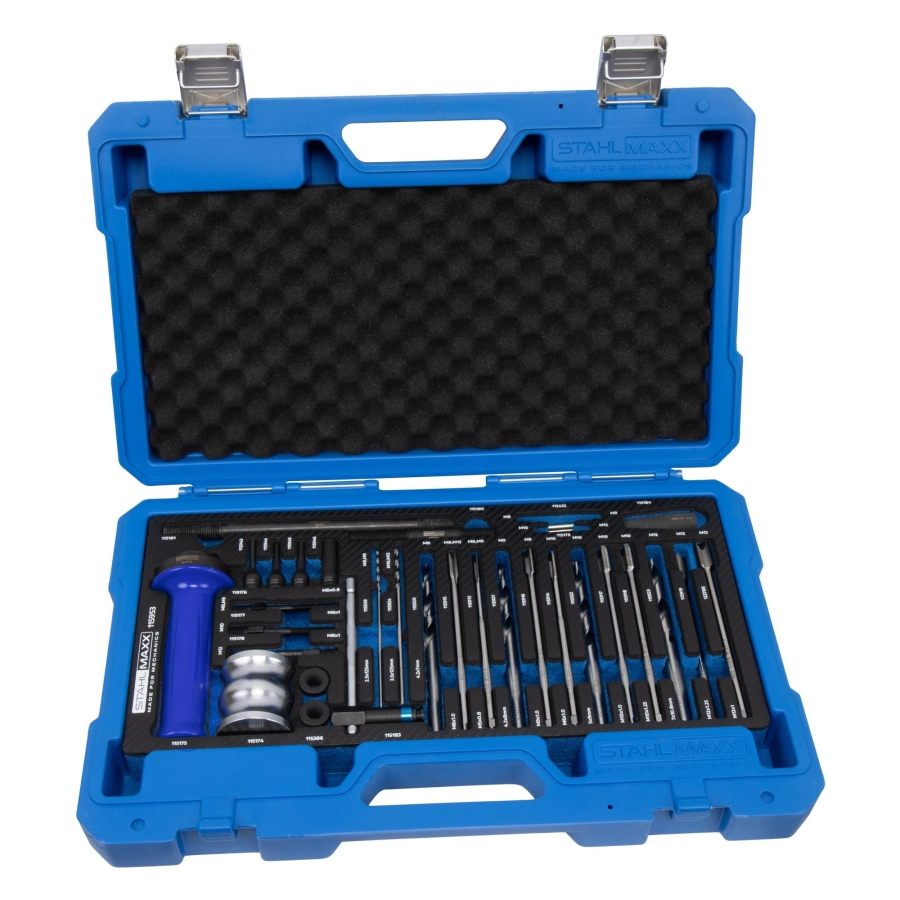
Broken Glow Plug Drilling, Extraction and Thread Repair System, M8–M12
The modular workshop system contains HSS-Co5 drills, taps, centring tools, pull bolts and a configurable slide hammer for drilling and extracting M8, M9, M10 and M12 glow plugs with the cylinder head installed.
Before drilling: Establish the exact break variant and drilling depth. Protect all open engine passages from swarf, keep the drill aligned with the glow plug axis, use suitable drilling and cutting oil, and mark the maximum drilling depth visibly on the drill.
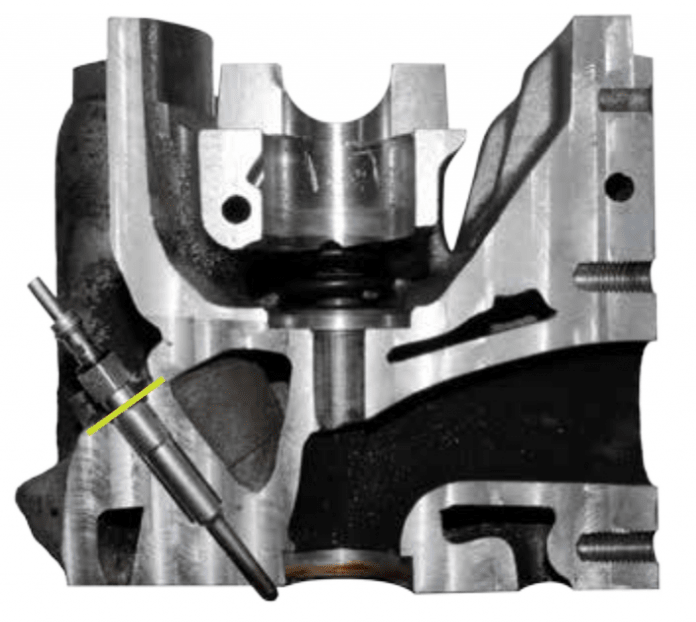
Identify the Broken Glow Plug
The cross-sectional illustration shows a glow plug with the drive hexagon broken away. The marked line indicates the typical separation area.
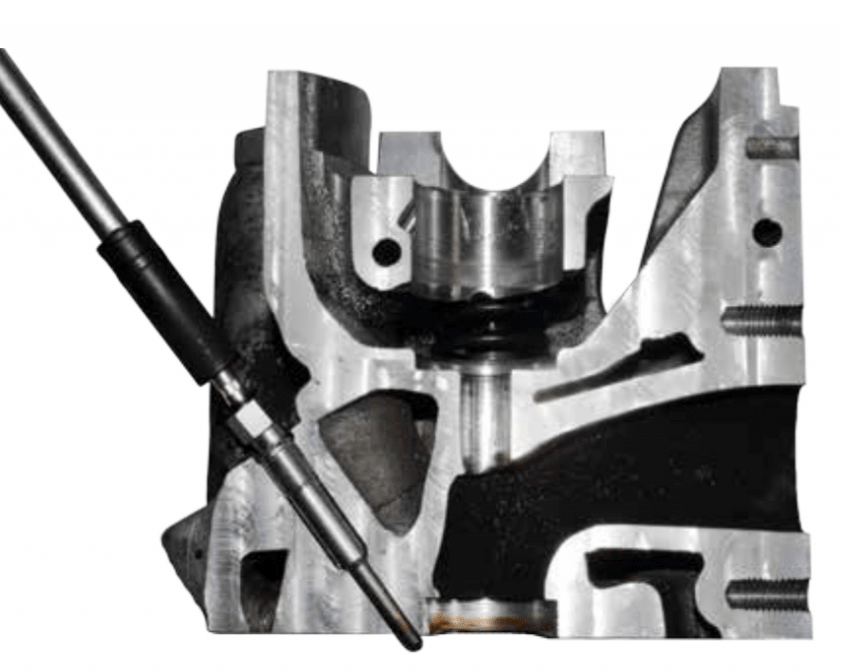
Remove the Broken Components
Remove the centre electrode using the appropriate special insert. Different components may remain depending on where the glow plug fractured.
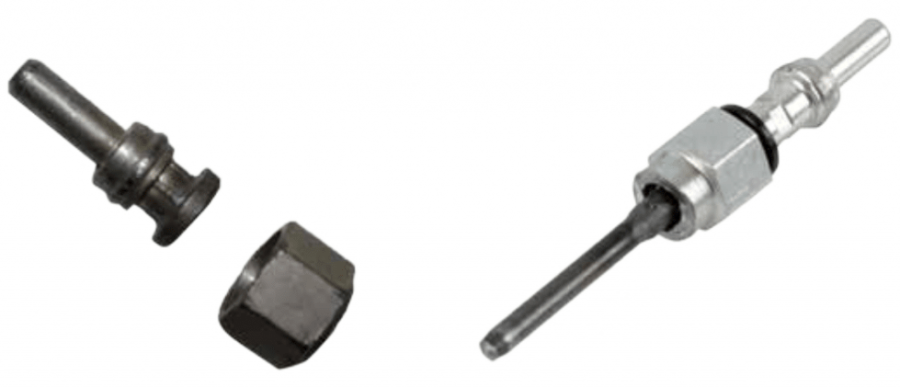
Determine Which Components Were Removed
Variant A
Removed: centre-electrode cap including the hexagonal drive.
Continue with Step 3.
Variant B
Removed: cap including the centre electrode and hexagonal drive.
Continue with Step 5. If the centre electrode remains visible, perform Step 4 first.
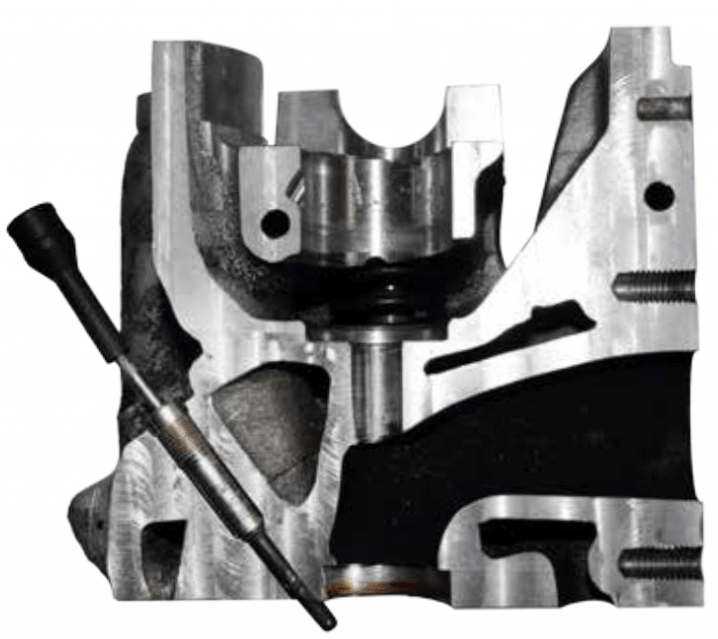
Remove the Remaining Centre Electrode
Use the correctly sized special twist-off insert to remove the remaining centre electrode and prepare the glow plug body for centred drilling.
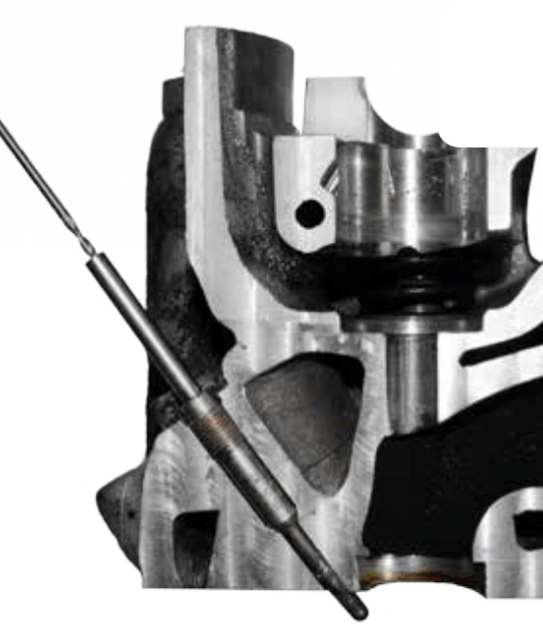
Drill Out the Electrode if Required
Remove the electrode deeply enough for the following drilling operation. Use the appropriate drill-centring sleeve and matching drill bit.
Important: Protect all open engine passages from drilling swarf.
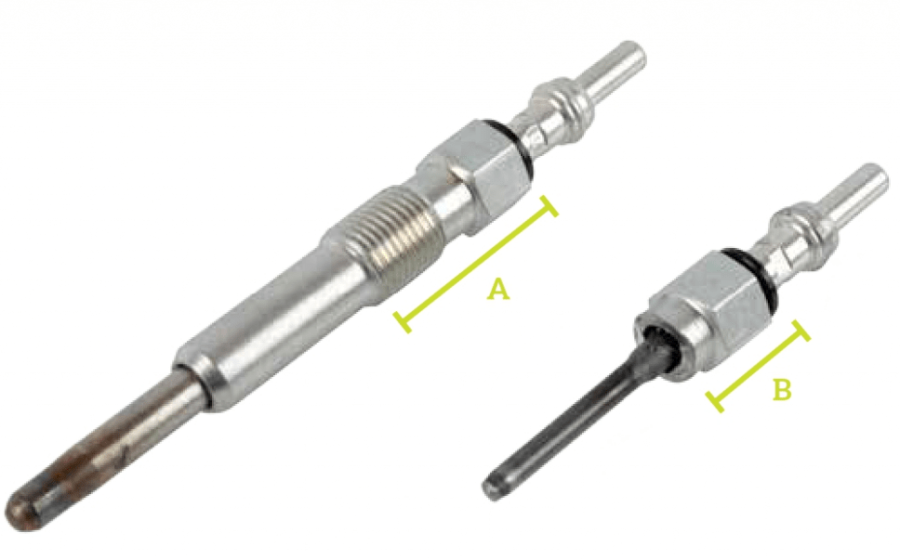
Calculate the Drilling Depth
A = total length of an identical intact glow plug
B = length of the broken component that has already been removed
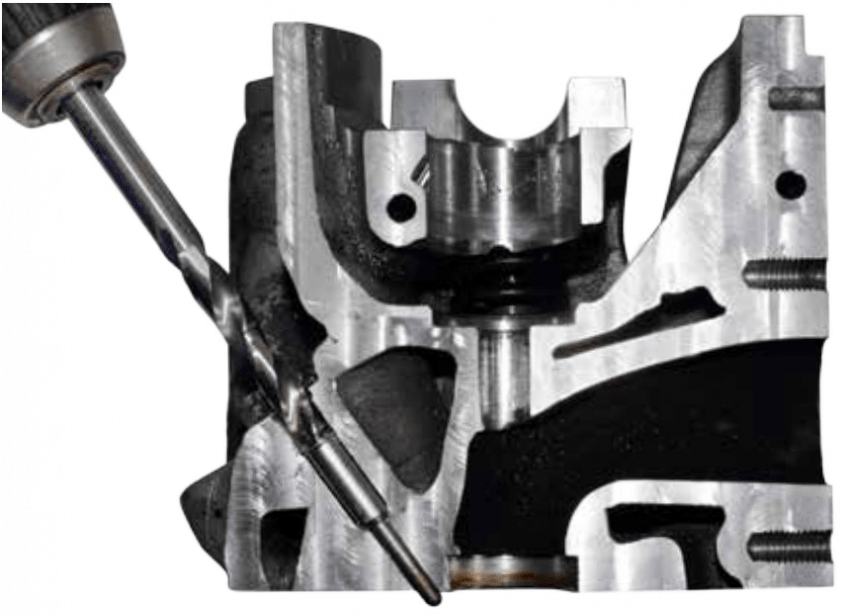
Drill Out the Glow Plug Body
Mark the calculated depth on the drill using a permanent marker or adhesive tape. Drill straight and use suitable drilling and cutting oil.
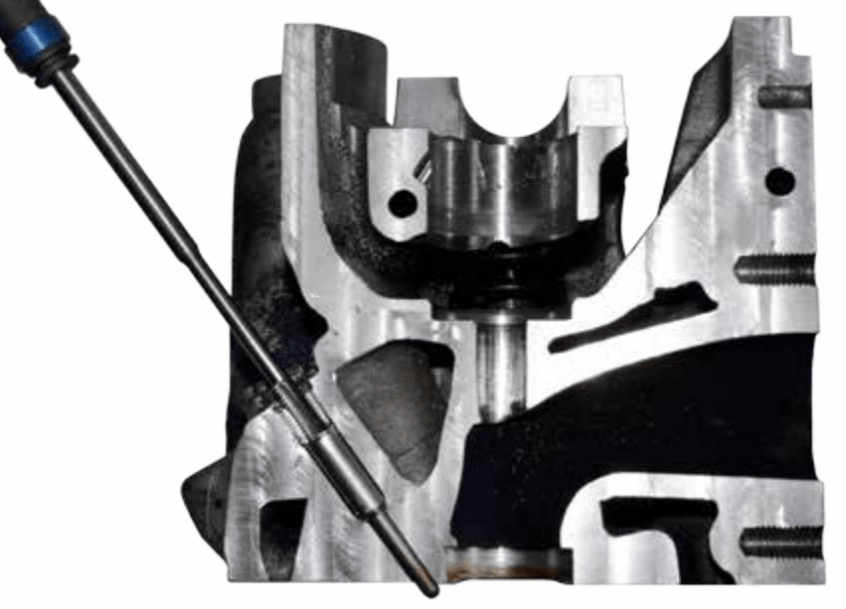
Cut the Thread for the Puller
Cut the appropriate internal thread and screw the corresponding threaded pull bolt securely into the remaining glow plug body.
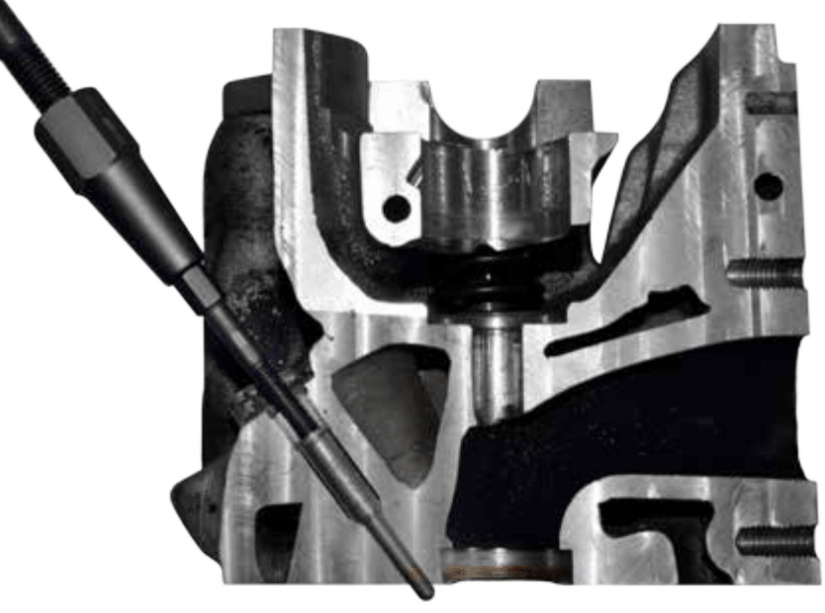
Extract the Remaining Glow Plug
Connect the pull bolt to the slide hammer using the matching adapter. Select the 100 or 200 mm slide rod according to the available space, then remove the remaining body using controlled axial impacts.
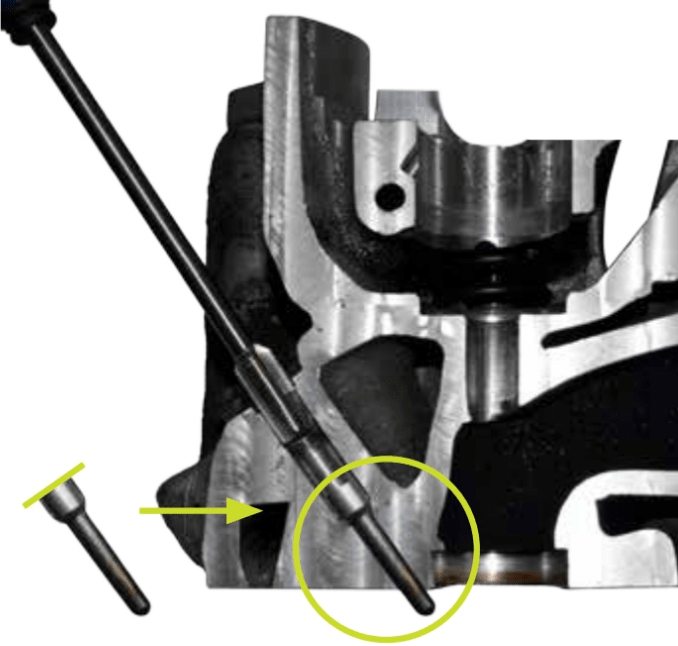
Re-cut the Original Glow Plug Thread
Use a tap matching the original glow plug thread. The tool procedure uses the shortened and thoroughly cleaned removed tip as a temporary barrier against swarf. Apply multipurpose grease to the tap so that metal particles adhere to the tool.
Tap size = original glow plug thread size
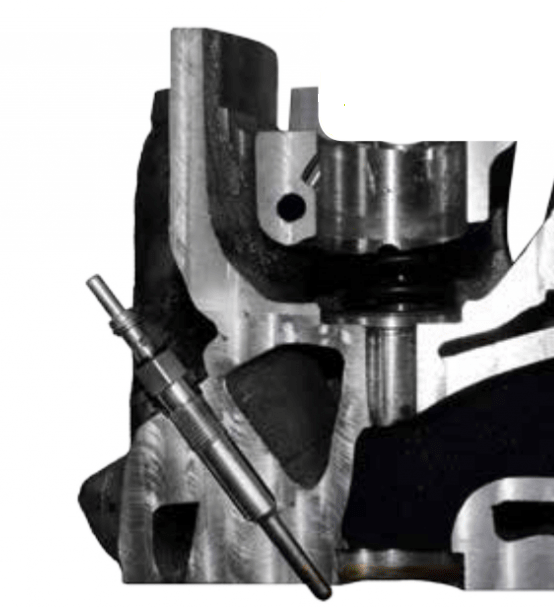
Clean the Bore and Install the Replacement
Clean the glow plug bore with a suitable reamer. If the original thread cannot be restored reliably, install the correct repair insert before fitting the new glow plug.
Always observe the tightening torque specified for the exact replacement glow plug.
Repair a Damaged Glow Plug Thread
Restore a lightly damaged original thread or install a solid repair insert when the thread can no longer retain the glow plug.
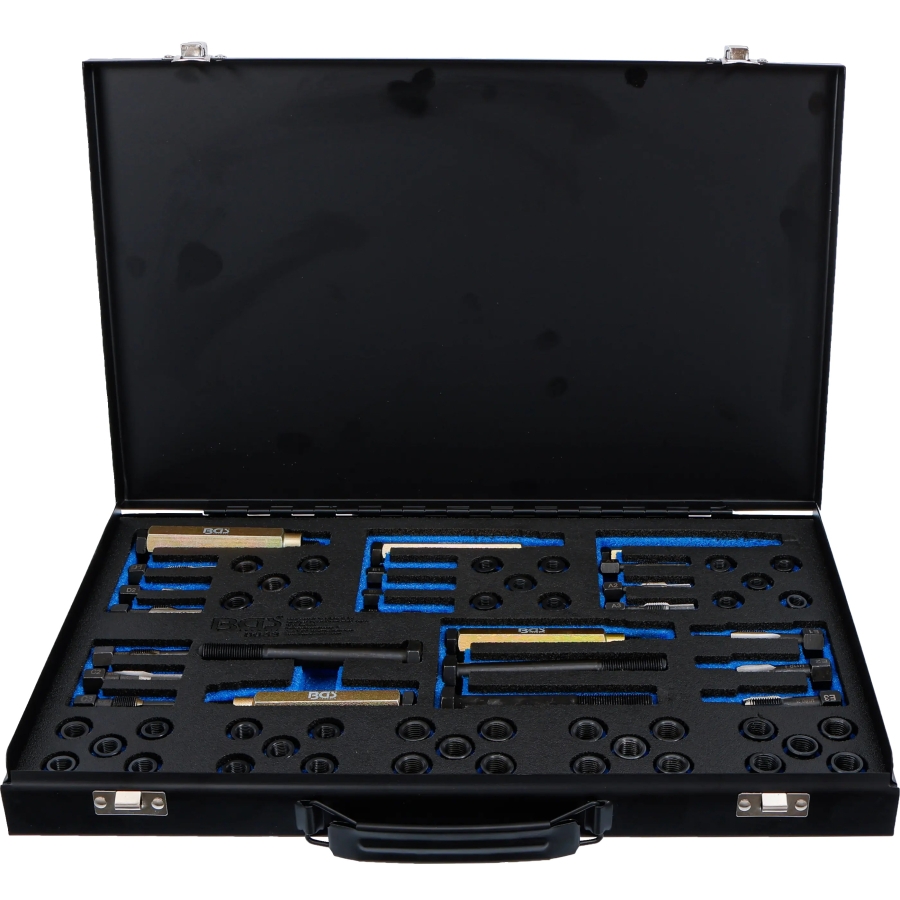
Glow Plug Thread Repair Tools
The correct repair set depends on the original glow plug thread. Available systems cover M8×1.0, M9×1.0, M10×1.0, M10×1.25 and M12×1.25 threads.
Re-cut the Original Thread
Use the thread chaser matching the original diameter and pitch. Keep it aligned with the existing thread, use suitable lubricant and control the swarf. The repaired thread must allow the replacement plug to screw in by hand and hold its specified tightening torque.
Install a Thread Repair Insert
Ream the damaged bore, cut a new receiving thread and install a correctly sized insert to recreate the original glow plug mounting thread.
Thread insert procedure
- Ream out the severely damaged original thread using the reamer specified for the selected repair insert.
- Use the matching tap to cut the new internal receiving thread. Its size must correspond to the insert’s external thread.
- Slide the installation sleeve onto the correct installation bolt and screw on an insert of the required length.
- Screw the insert into the newly prepared thread and tighten it lightly to its intended installed position.
- Remove the installation bolt and sleeve, then verify the insert position, glow plug seat and bore cleanliness.
Recommended: Secure the insert in the newly cut receiving thread with a suitable high-temperature thread-locking compound approved for the repair. This helps prevent the insert from unscrewing during a later glow plug replacement.
Clean, Inspect and Install the New Glow Plug
The repair is complete only after all debris is removed and the replacement plug seats and tightens correctly.
Before installation
- Confirm that the complete old glow plug and heating tip have been recovered.
- Remove drilling chips, thread-cutting residue, carbon and other contamination.
- Clean the glow plug bore with the correct reamer and inspect it with suitable lighting or a borescope.
- Check the sealing seat, thread alignment and repair insert position.
Installing and checking
- Start the replacement glow plug by hand to prevent cross-threading.
- Do not automatically apply anti-seize or other compounds; follow the glow plug manufacturer’s instructions.
- Tighten with a calibrated torque wrench to the exact specified value.
- Reconnect the electrical terminal correctly, clear relevant fault codes and perform a final functional test.
Stop and reassess the repair if the new glow plug will not screw in smoothly by hand, the thread cannot hold the specified torque, the sealing seat is damaged, debris cannot be removed reliably, or a broken component may have entered the combustion chamber.
Glow Plug Removal and Repair FAQ
Quick answers to the most common workshop problems covered by this guide.
Can a broken glow plug be removed without removing the cylinder head?
Often yes. Purpose-built centring, drilling, tapping and extraction systems allow many repairs to be completed with the cylinder head installed. Success depends on access, the break position, accurate drilling depth and reliable control of swarf. Cylinder-head removal may still be required if those conditions cannot be met.
Why does a glow plug spin but not come out?
The cylinder-head thread may be stripped, the glow plug may already be fully unthreaded but carbon-bound in the bore, or the hex drive may have separated and be rotating independently. The marker test on the centre contact distinguishes whole-plug rotation from a separated drive.
How do I know whether the complete plug or only the hex is rotating?
Mark one side of the centre electrical contact and observe it relative to a fixed point while turning the hex slightly. If the mark rotates with the hex, the complete plug body is moving. If the mark remains stationary, only the separated drive section is rotating.
What should I do if the glow plug tip remains in the cylinder head?
Do not start the engine. Install the correct threaded drill guide, mark the safe drilling depth, drill a centred hole in the tip, cut the extraction-spindle thread and pull the tip out with the supported extraction adapter.
Can a stripped glow plug thread be repaired?
Yes. Slight damage can often be restored with the correct thread chaser. A severely damaged or stripped thread is reamed and tapped for a suitable repair insert that recreates the original glow plug thread.
Can I use a normal impact gun to remove glow plugs?
No conventional high-torque wheel impact gun should be used. Glow plug removal requires a purpose-designed high-frequency, low-torque tool, progressive settings and strict observance of the permitted loosening or breakage torque.
Why should modern glow plugs not be tested directly with battery voltage?
Many modern plugs operate below vehicle battery voltage. Direct battery testing can overheat and damage the element before its condition can be assessed safely. A multivolt diagnostic tester measures the installed glow plug without applying an unsuitable test voltage.


Post comment